
This article introduces how to shrink a partition in Windows Server 2012 R2 without losing data. Shrink volumes with inbuilt Disk Management and safe partition software.
Shrink Partition in Server 2012 Disk Management
When you want to shrink an NTFS partition to create a new volume, you can achieve this without third-party software. Windows Server 2012 Disk Management has the "Shrink Volume" function, which is able to decrease partition size and release unallocated space without losing data (in most cases).
How to shrink a partition in Server 2012 R2 via Disk Management:
- Press Windows and X on the keyboard, then select Disk Management from the list.
- Right-click an NTFS partition and select Shrink Volume.
- Enter an amount of space and click Shrink.
Disk Management can only generate unallocated space on the right side when shrinking a partition.
Scenarios Where You Cannot Shrink a Partition in Server 2012
In some servers, Disk Management cannot shrink a partition or gives you very little available space to shrink. In most cases, this is caused by "unmovable" files. Another possible reason is a filesystem error.
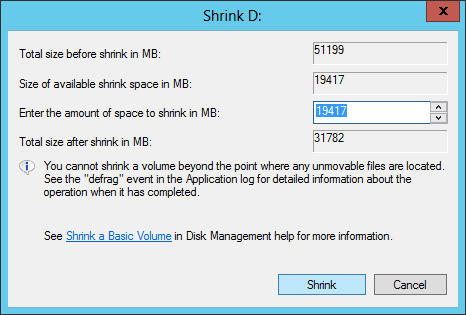
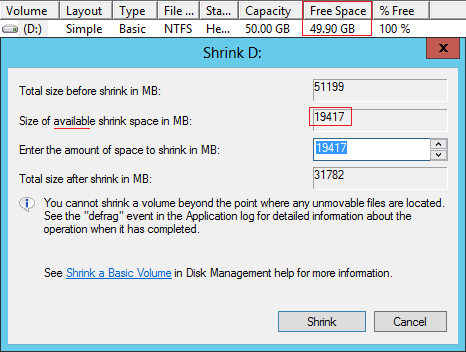
In the test server, the D: drive is blank, but Disk Management gives only 19417MB (18.96GB) of available space in the shrinking window, meaning the user can only shrink the D drive down to 31.04GB.
On some servers or PCs, Disk Management cannot shrink a volume by even 1MB. This type of issue is also commonly encountered on Windows 10 computers.
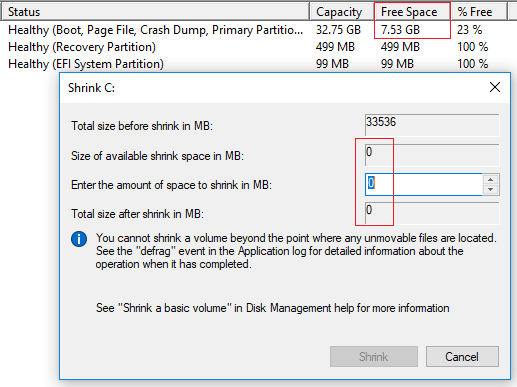
As noted in the shrinking window tip, you cannot shrink a volume beyond the point where any unmovable files are located.
Unmovable files include the paging file, hibernation files, and other large system files. If any type of unmovable file is located in the third block, you cannot shrink the partition to the second or first block, even though there is free space available there.

Only NTFS-formatted partitions are supported; Disk Management cannot shrink FAT32, EFI, Recovery, or OEM partitions.
Shrink Server 2012 Volume with Safe Partition Software
Compared with Server 2012 Disk Management, NIUBI Partition Editor offers more advantages when shrinking a partition:
- Both NTFS and FAT32 partitions are supported.
- Unallocated space can be generated on either the left or right side.
- It can move unmovable files and shrink partitions to a much smaller size.
- Unallocated space can be merged into other partitions on the same disk.
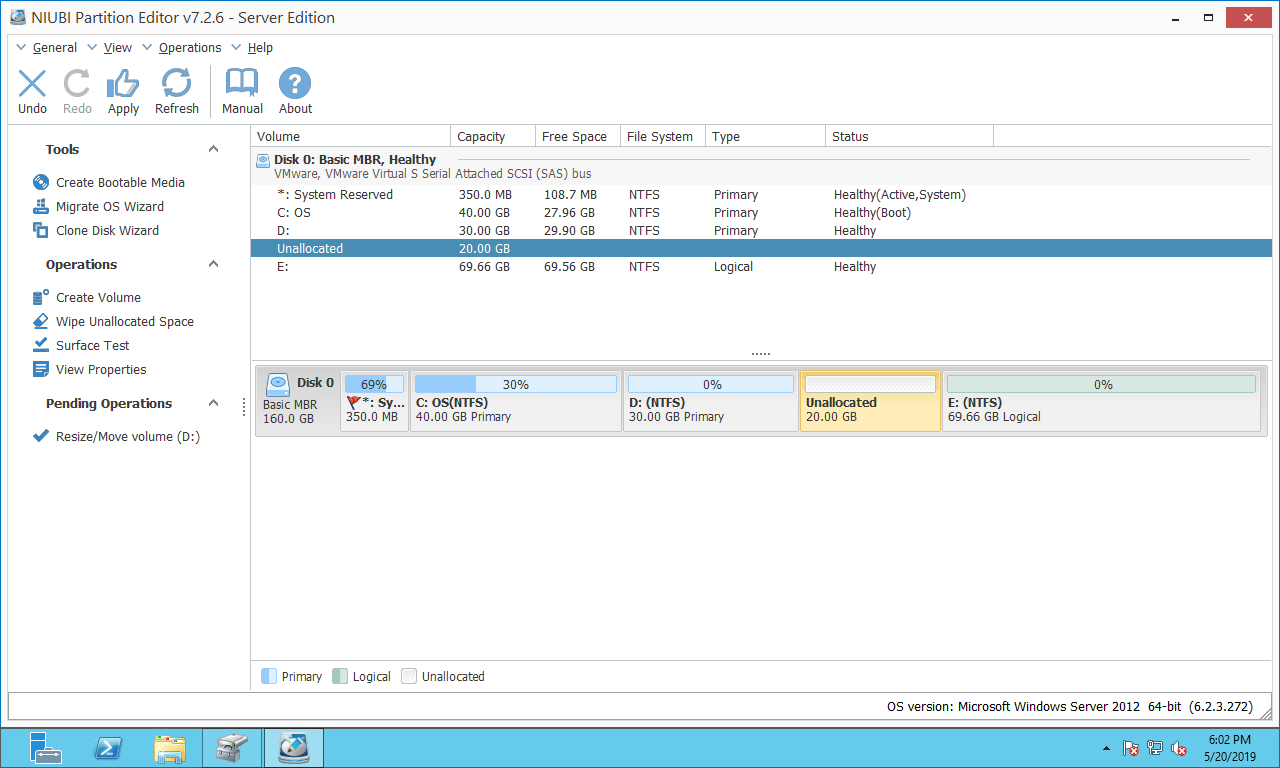
Download NIUBI Partition Editor, and you will see all disk partitions with their structure and other information in the main window.
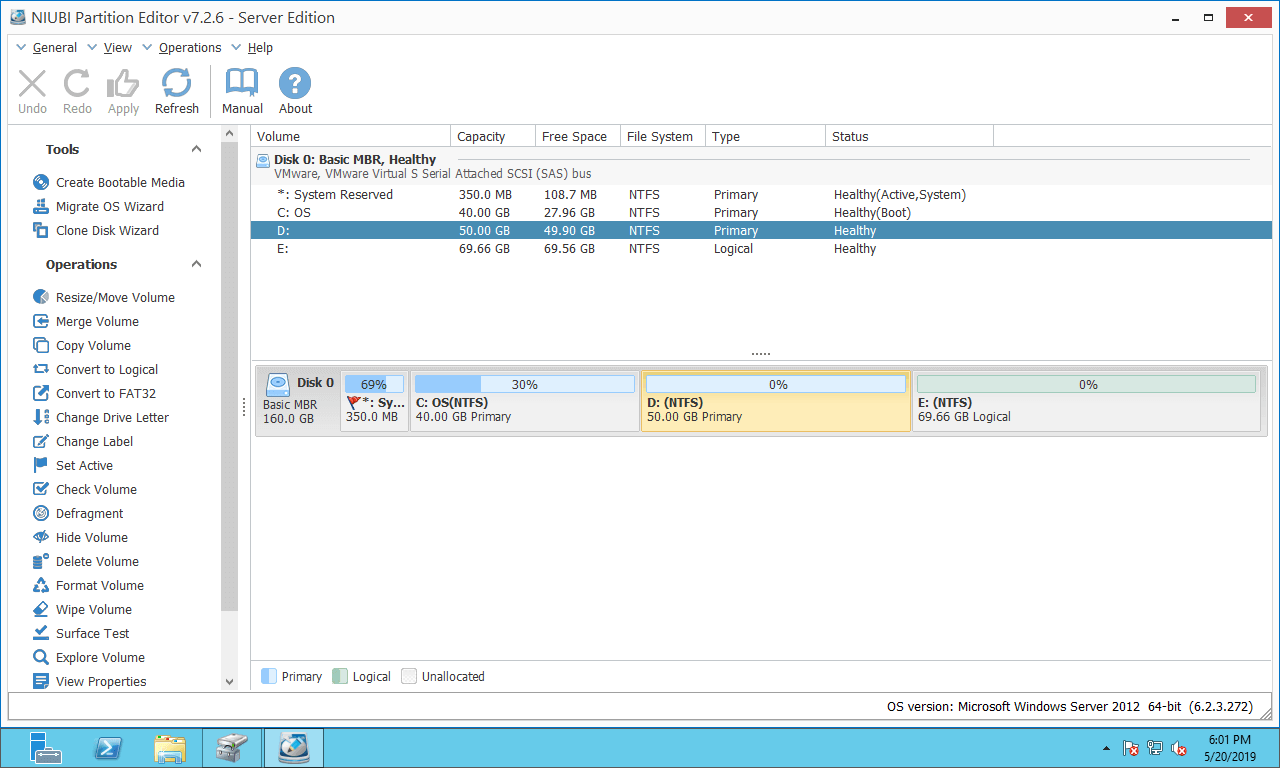
How to shrink a partition in Windows Server 2012 R2 with NIUBI:
Right-click the D: drive (or another drive) and select "Resize/Move Volume"; you have two options in the pop-up window.
Option 1: If you drag the left border to the right:
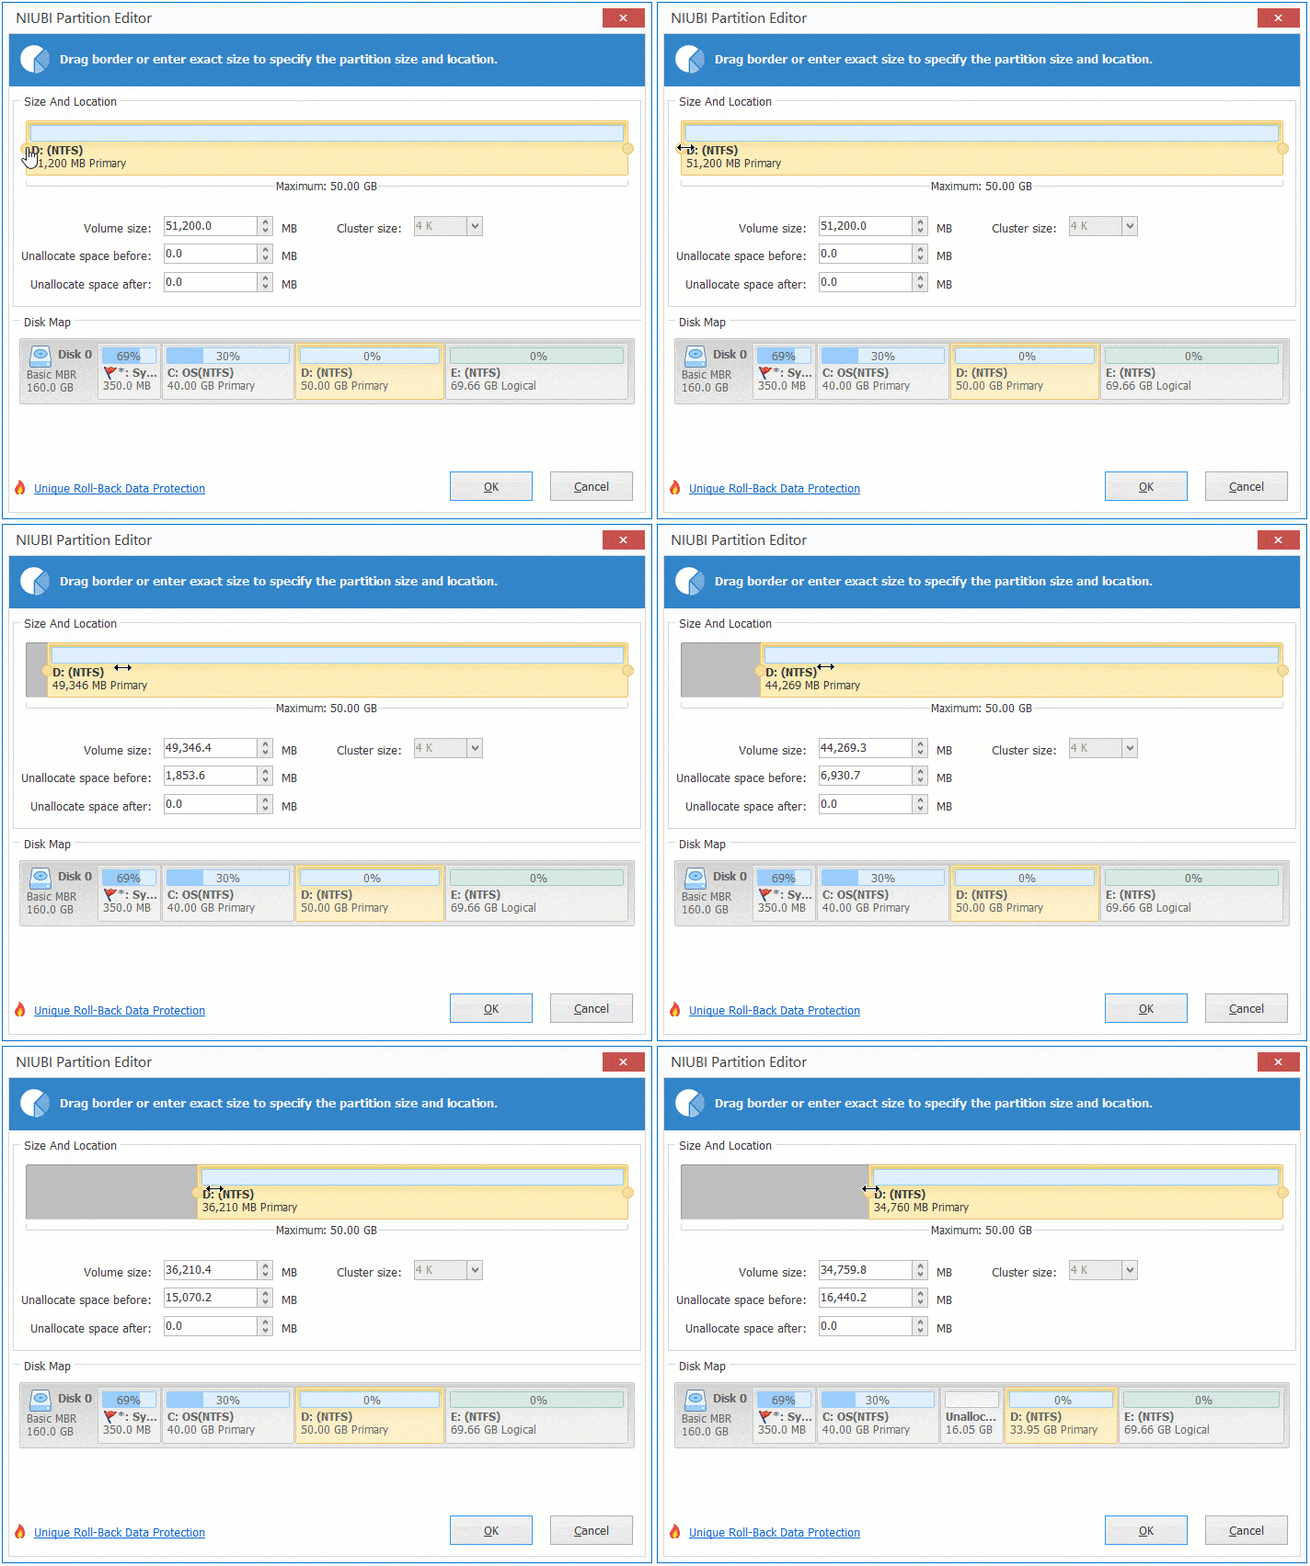
Unallocated space will be generated on the left side of the D drive.
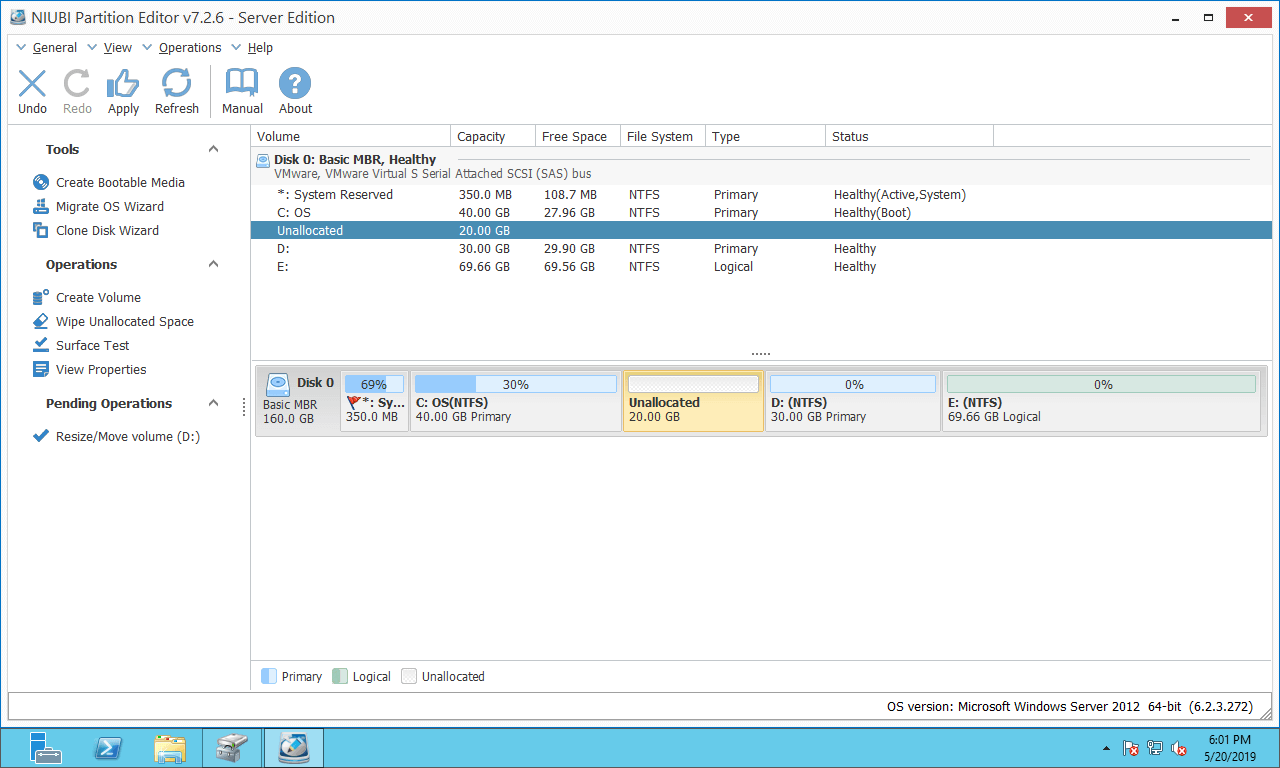
Option 2: If you drag the right border to the left:
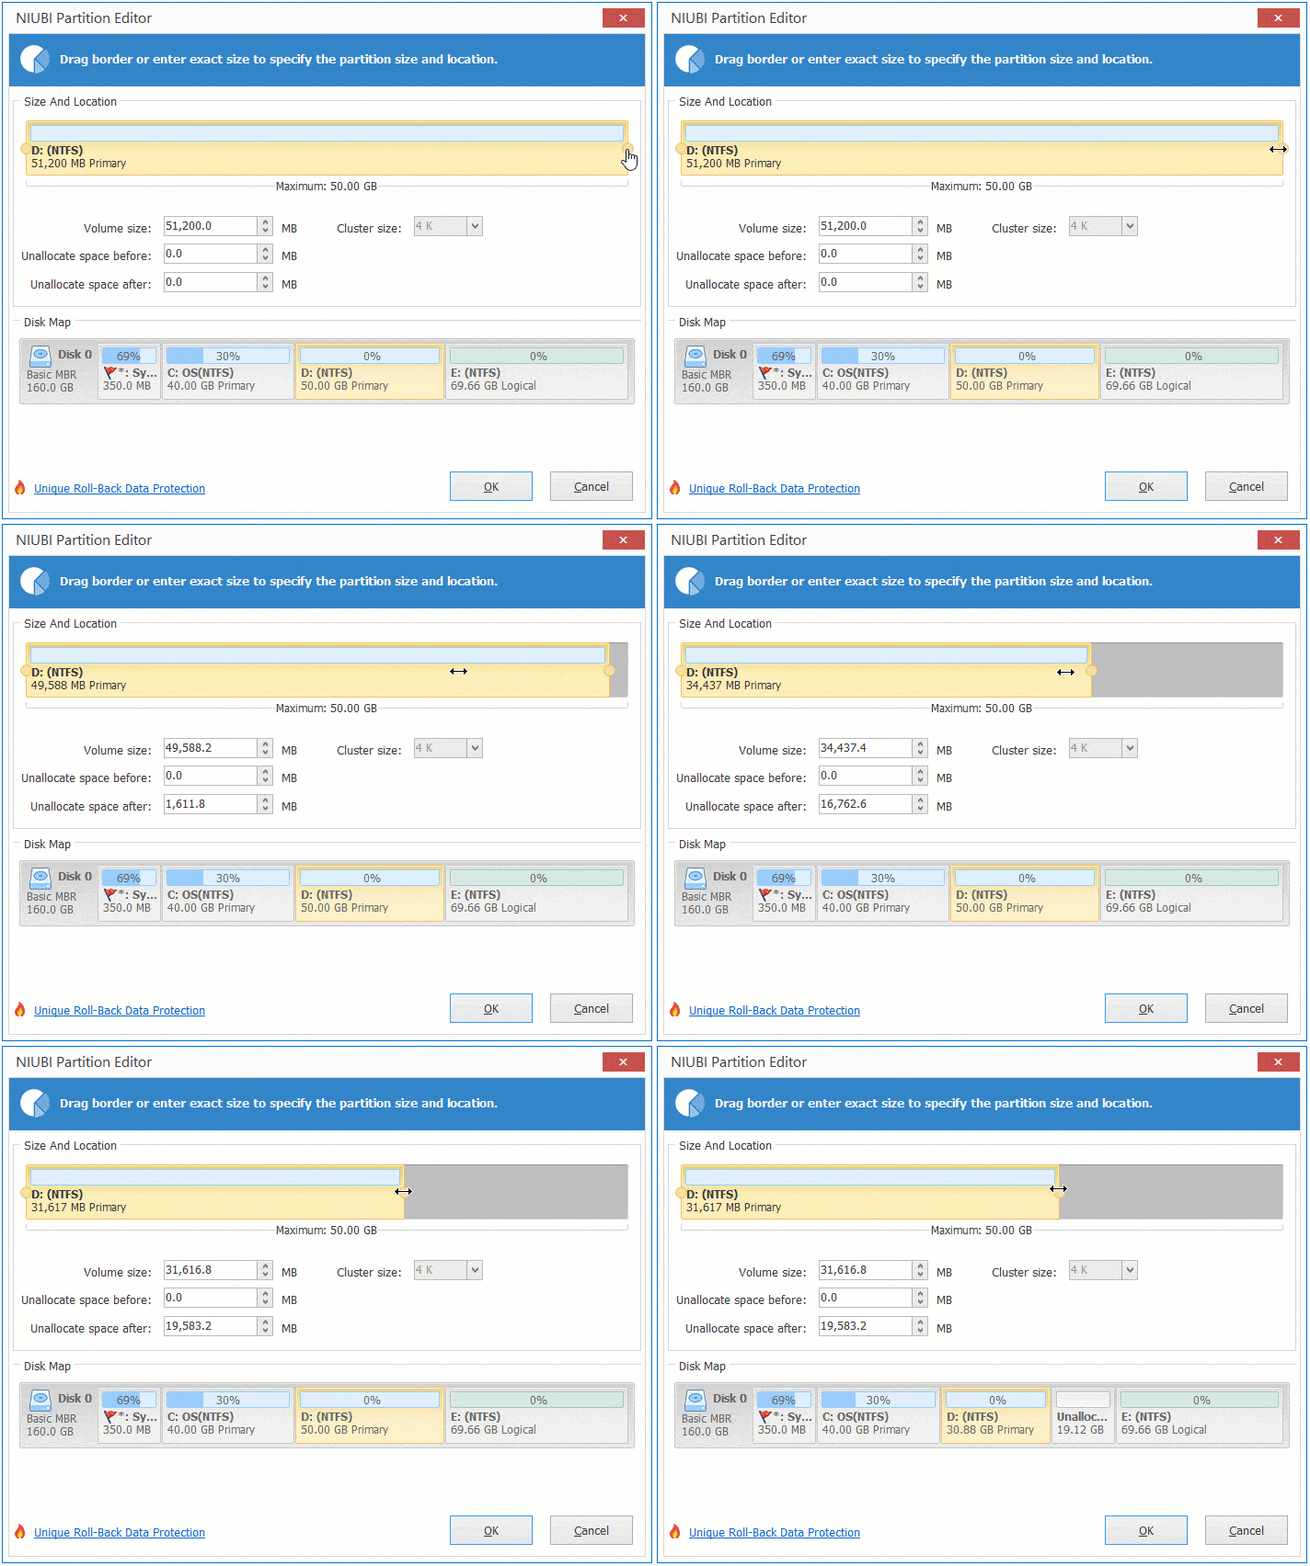
Unallocated space will be generated on the right side of the D drive.
Shrink Partition D to Expand C or E
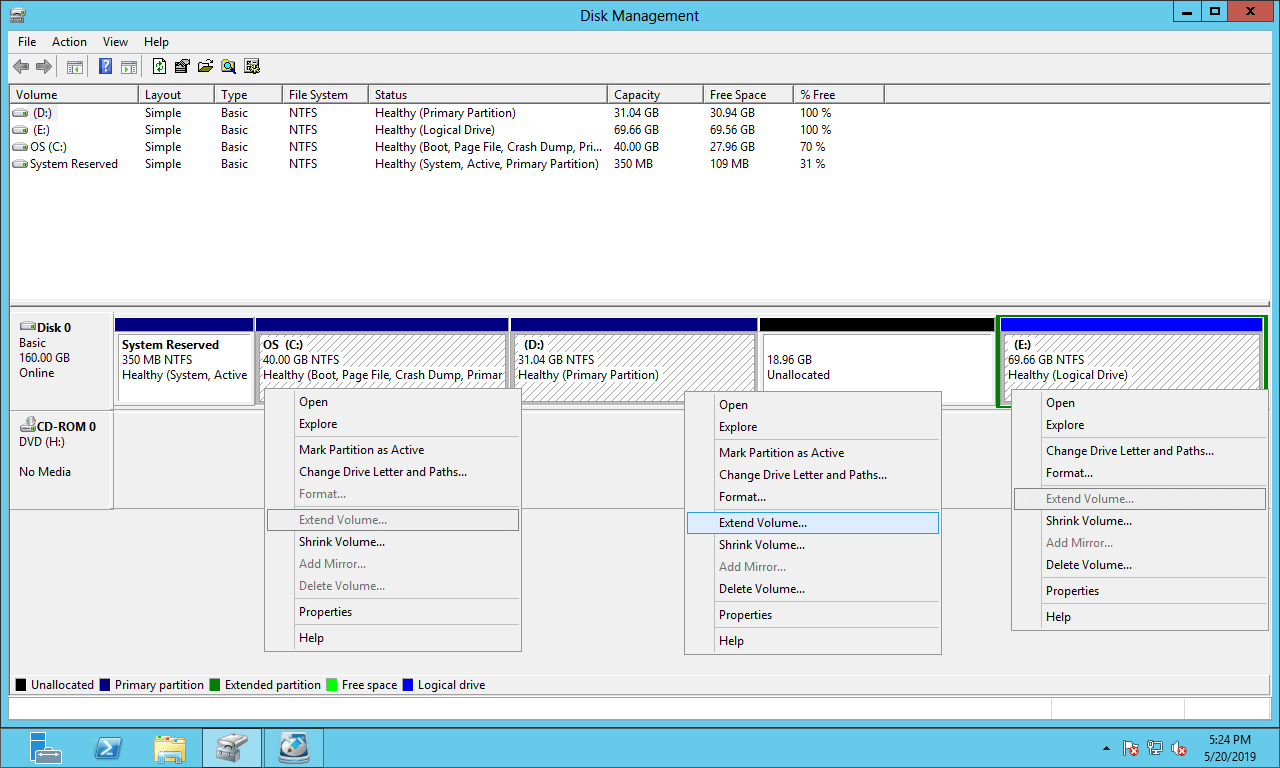
If you want to extend another drive by shrinking a partition in Disk Management, it is impossible because of two major restrictions:
- Unallocated space cannot be generated on the left side when shrinking a drive (such as the D: drive), making it non-adjacent to the C: drive.
- "Extend Volume" cannot merge unallocated space into any non-adjacent partition or the right contiguous partition (the E: drive).
As shown, Extend Volume is disabled for both the C: and E: drives after shrinking D.
If you want to extend partitions in Server 2012 by shrinking other volumes, NIUBI Partition Editor works smoothly and easily. Follow the steps in the video:
Better than other tools, NIUBI Partition Editor features Virtual Mode, Cancel-at-Will, 1-Second Rollback, and Hot Clone technologies to protect your system and data. Because of its advanced file-moving algorithm, it is much faster at shrinking, moving, and copying partitions. Besides shrinking and extending partitions for Server 2012 and other versions, it helps you perform many other disk partition management operations.
 © 2009 - NIUBI Technology All Rights Reserved. |