
This article introduces how to resize the C: drive in Windows Server 2012 R2. 3 ways to adjust the size of volume C for Server 2012 without losing data.
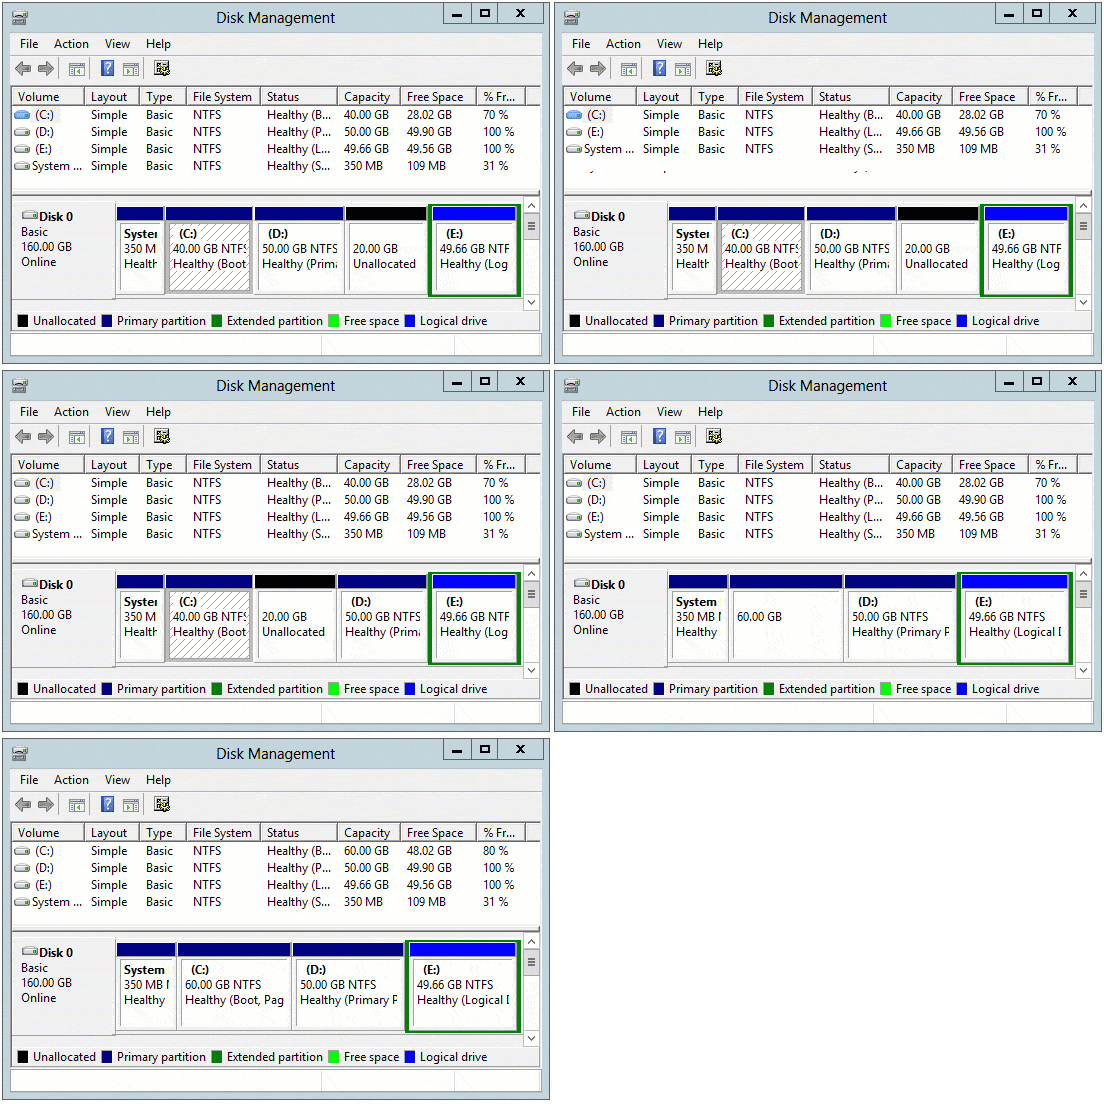
Limitation to Resize C Drive in Server 2012 Disk Management
Many server administrators want to adjust the size of allocated partitions without reinstalling the operating system or restoring from a backup. For example: some people forget to edit partitions while installing Windows, so the C: drive occupies all the space on this disk. In this case, they need to shrink the C: drive to create more volumes. On many servers, the system C drive is getting full, so the administrators want to resize the C drive larger.
Whether you want to shrink or expand the C: drive, Microsoft provides the native Disk Management tool to help you. However, both "Shrink Volume" and "Extend Volume" functions work under specific conditions:
- When shrinking the C drive, unallocated space can only be created on its right side.
- To extend the C drive, there must be adjacent unallocated space on its right side.
Thus, you cannot resize partition C to expand another one, or shrink another volume to expand the C drive. In other words, Disk Management can only help you shrink the C drive to create new volumes, or enlarge the C drive by deleting the right adjacent partition.
Better Way to Resize Partition C in 2012 Server
With NIUBI Partition Editor, there are no such restrictions. It is able to:
- Create unallocated space on either side while shrinking a partition.
- Merge unallocated space into either contiguous partition in 1 step.
- Move and merge unallocated space into any non-adjacent partition.
In other words, NIUBI helps you:
- Resize volume C to expand partition D or the left System Reserved partition.
- Resize other data volumes to extend the system partition C.
All you need to do is drag and drop on the disk map.
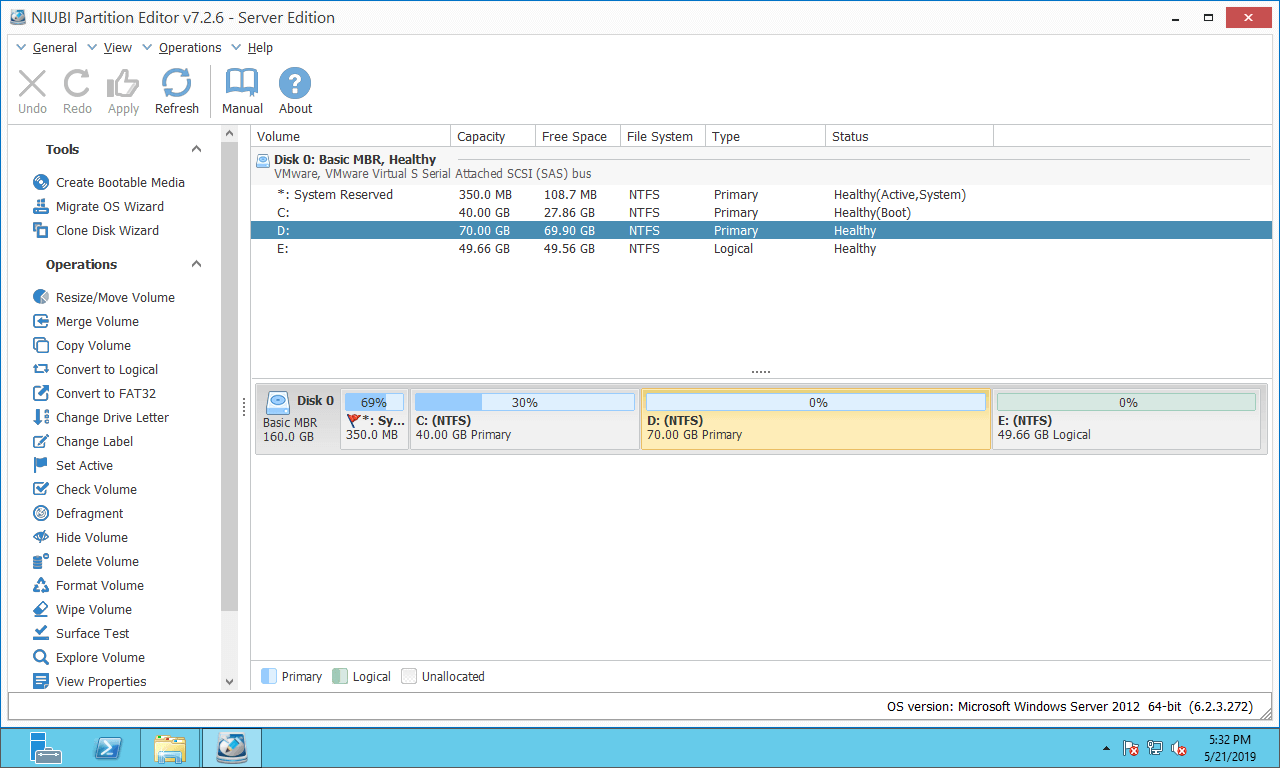
Download NIUBI Partition Editor and you'll see all disk partitions with structure and other information.
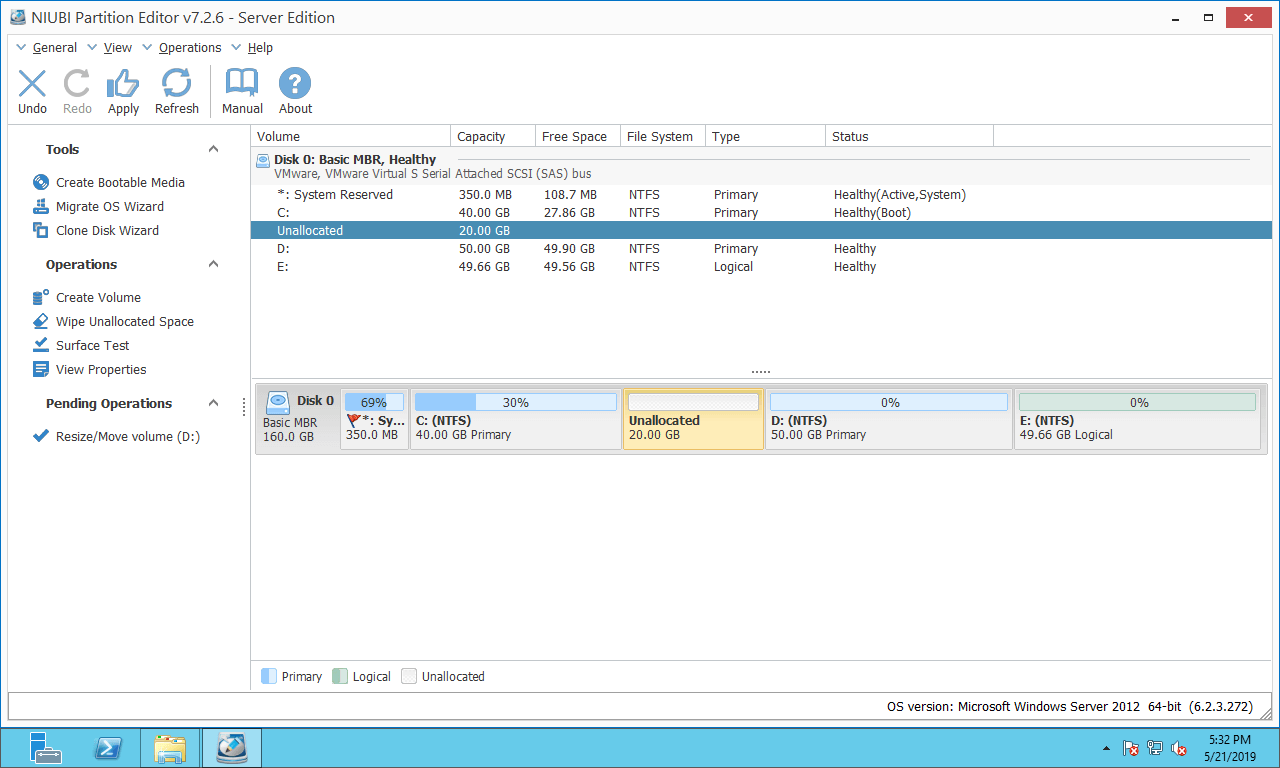
In the example below, there are C, D, E, and a system reserved partition on Disk 0. The original C: drive is 40GB and D: is 70GB.
Steps to shrink D and resize C drive in Windows Server 2012 R2:
Step 1: Right-click drive D: and select "Resize/Move Volume", then drag the left border to the right in the pop-up window. (or enter an amount directly)
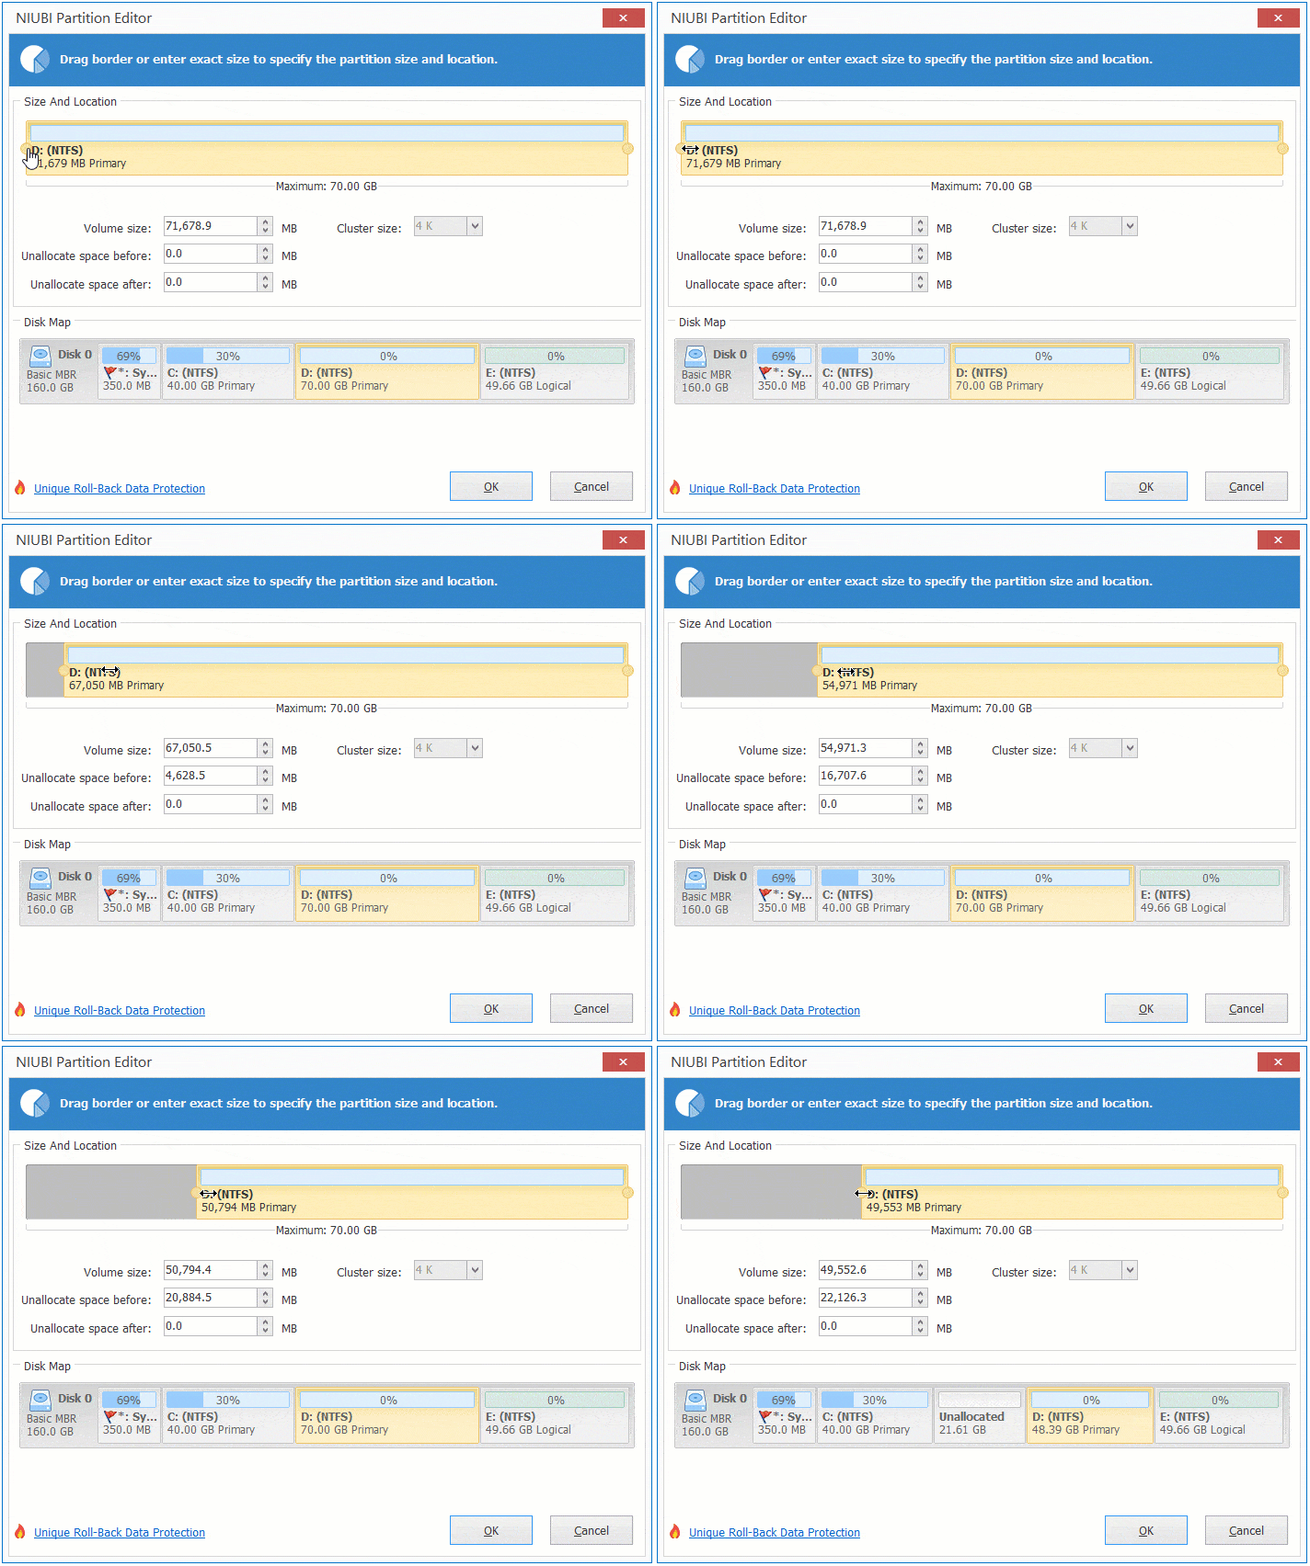
Then drive D is resized to 50GB, and 20GB of unallocated space is created on the left side.
Step 2: Right-click the C: drive and select "Resize/Move Volume" again, then drag the right border to the right to merge this unallocated space.
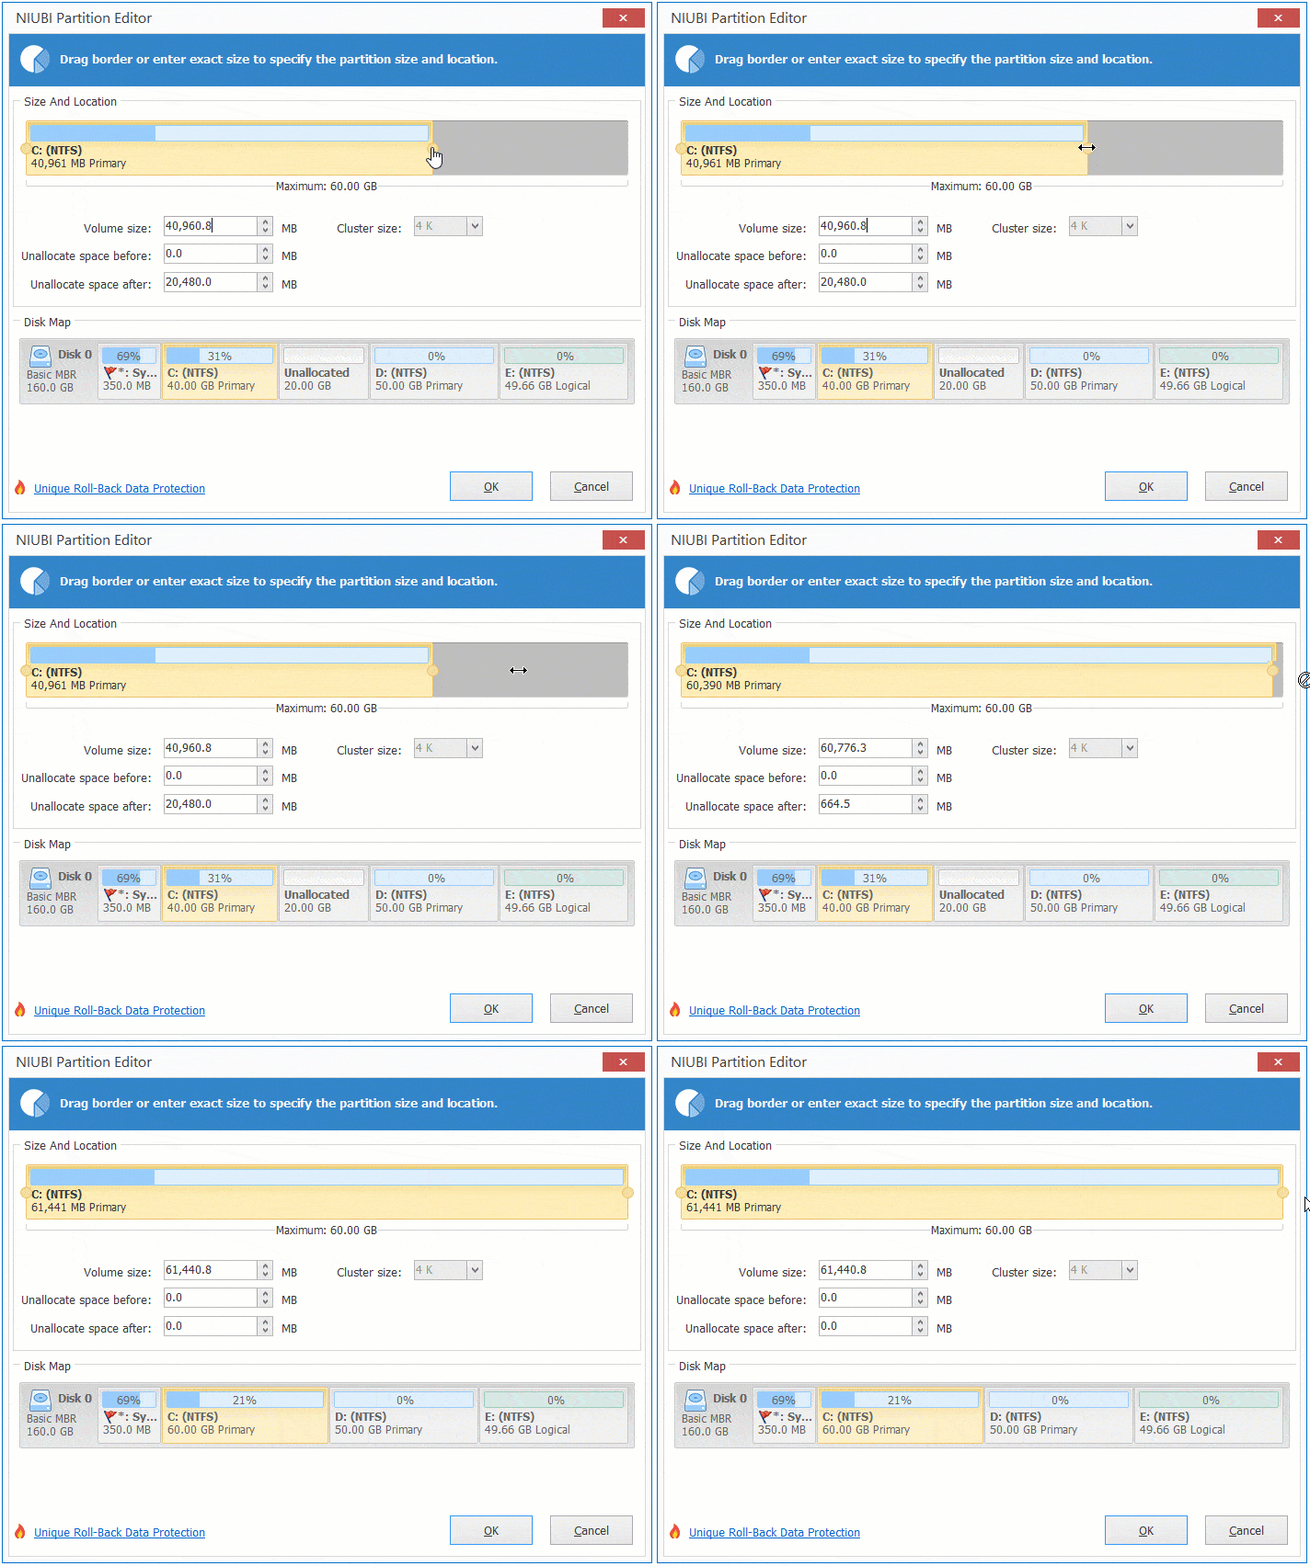
Then the system volume C is resized to 60GB.
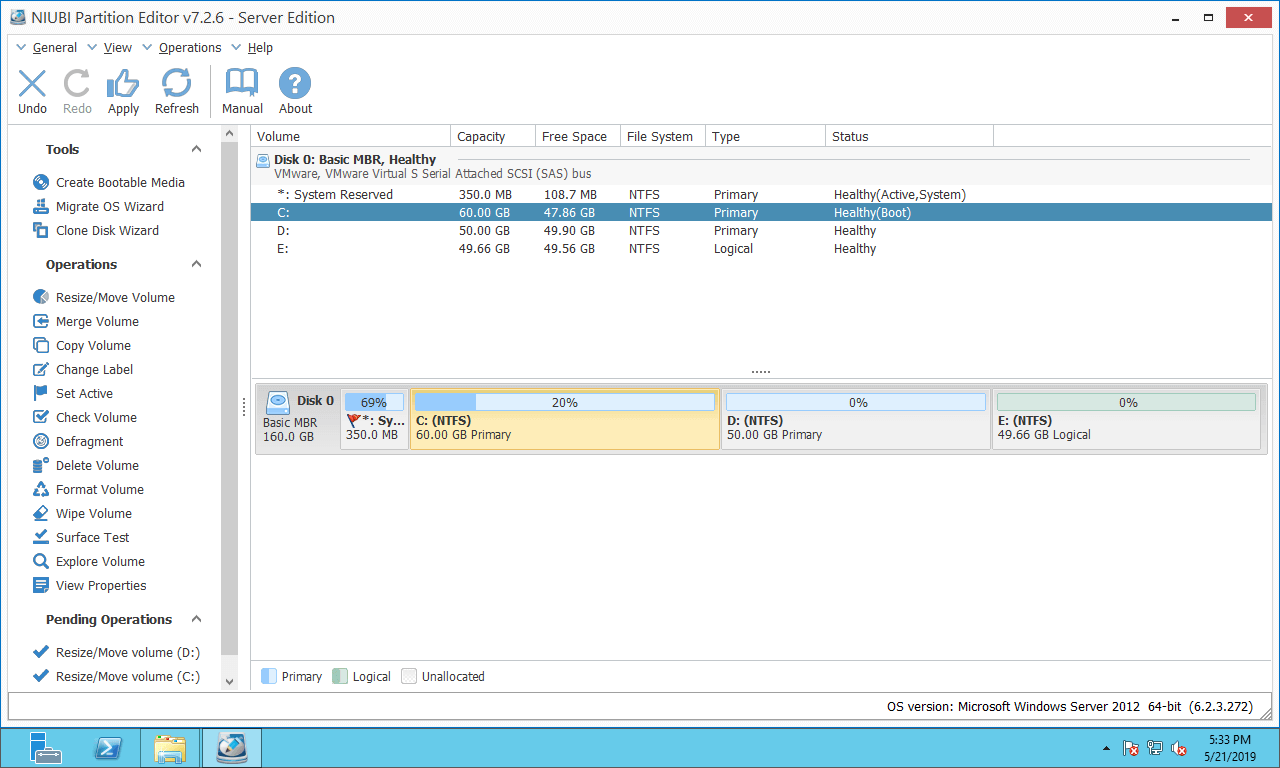
Step 3: Click "Apply" on the top left to execute the changes to the real disk partitions. (All operations before this step only work in virtual mode.)
Watch the video on how to resize other partitions to expand the C drive:
How to resize the C drive in Server 2012 R2 to expand other volumes:
Adjust C Drive Size with Another Disk
Following the steps above, you can resize partitions and transfer unused/unallocated space inside a hard disk easily. However, if there is no other partition or not enough unused space on the same disk, no partitioning software can transfer space from another separate disk.
In this situation, you can clone the disk to a larger one and resize the C: drive with extra disk space. Follow the steps in the video:
NIUBI Partition Editor provides a full solution to help you resize the C drive and other volumes in Windows Server 2012/2016/2019/2022 and previous Server 2003/2008. Select the corresponding method according to your disk partition configuration.
Compared with other software, it features unique technologies to protect data and save time:
- 1-Second Rollback - automatically reverts the disk partitions to their previous state instantly if it detects any error.
- Virtual Mode - all operations will be listed as pending for preview; real disk partitions won't be modified until you click "Apply" to confirm.
- Cancel-at-will - if you applied incorrect operations, you can safely cancel the ongoing operations at any stage before completion.
- Hot Clone - clone disk partitions without server interruption; you may clone the system disk before any operations or as a regular backup.
- Advanced file-moving algorithm - resize and move partitions 30% to 300% faster.
Besides resizing partitions without losing data, NIUBI Partition Editor is able to merge, copy, convert, hide, wipe, defrag, and scan partitions, and much more.
 © 2009 - NIUBI Technology All Rights Reserved. |